
Because what kayaking blog would be complete without a wrist/neck seal repair guide...
It's that time of year when it's time to start looking forward to the cooler, wetter months ahead, and realise that the trickle/ flood of water down the back of your neck every time you roll which has been increasing in volume all summer is going to get a whole lot harder to ignore over the next couple of weeks! So grab a beer, sit back and I'll take you step by step through what I did this evening. This is the cheapest, quickest and easiest way of replacing seals that I've come across, if you have any suggestions for making it easier let me know!
What you need:
A knackered cag/drysuit. Hopefully the source of all that water is torn/ gummy/ worn out seals and not the stitching or the material itself. A solid cag from the likes of PeakUK or Kokatat which is looked after reasonably well can be expected to outlast several sets of seals before wearing out and turning porous. Cheaper, less durable kit maybe not so much. The cag in these pictures is from the upper end of the Kokatat range and is on it's third neck seal and second set of wrist seals. It's been used regularly in salt water, only washed occasionally, never re-waterproofed and is over three years old. So pretty much not looked after at all, and I've done a whole lot of paddling in those three years. It's worth buying decent kit if you're going to be paddling a lot! (I use PeakUK and Kokatat as examples because they're the only manufacturers I have experience of, and I have been very impressed with the durability of the kit from both. I'm sure there are other brands on the market which are just as good, ask around to find out what has been working well for other people.)
A spare set of seals. SeaSkin have them for super cheap compared to some alternative sources. I have bought plenty from them, they're decent quality. Otherwise, most paddling shops will have them.
Glue. I use Evostick contact adhesive. The advantage of this is that there's no fiddling with a slippery, gluey cag, seals, cardboard, clothespegs, footballs, bottles or traffic cones, trying to get everything clamped together with the seals lined up right. And then praying that nothing moves while you're asleep. The disadvantage is that you had better be damn sure you can get it lined up right first time cos the seal ain't coming off again once it's stuck! (...sort of. It'll kind of peel off if you really need it to but it's difficult and best avoided!) Close enough = good enough here, if it's not lined up perfectly or there's a minor wrinkle somewhere don't worry about it. If you're worried a wrinkle is big enough to leak water you can always seal it with Aquasure afterwards. The alternative to impact glue is a urethane adhesive such as Aquaseal/ Aquasure. Bernard Walsh put together an excellent video showing this method which you can find here. I like the instant results of the impact glue and the simplicity of not having to find something to use as a jig but if you have more patience than I do then the Walshy Way works very well.
Sandpaper. There's not a lot to say here, use whatever you have to hand. I used wet and dry, all you're doing is roughening the surface of the rubber a little.
On to the How-To:
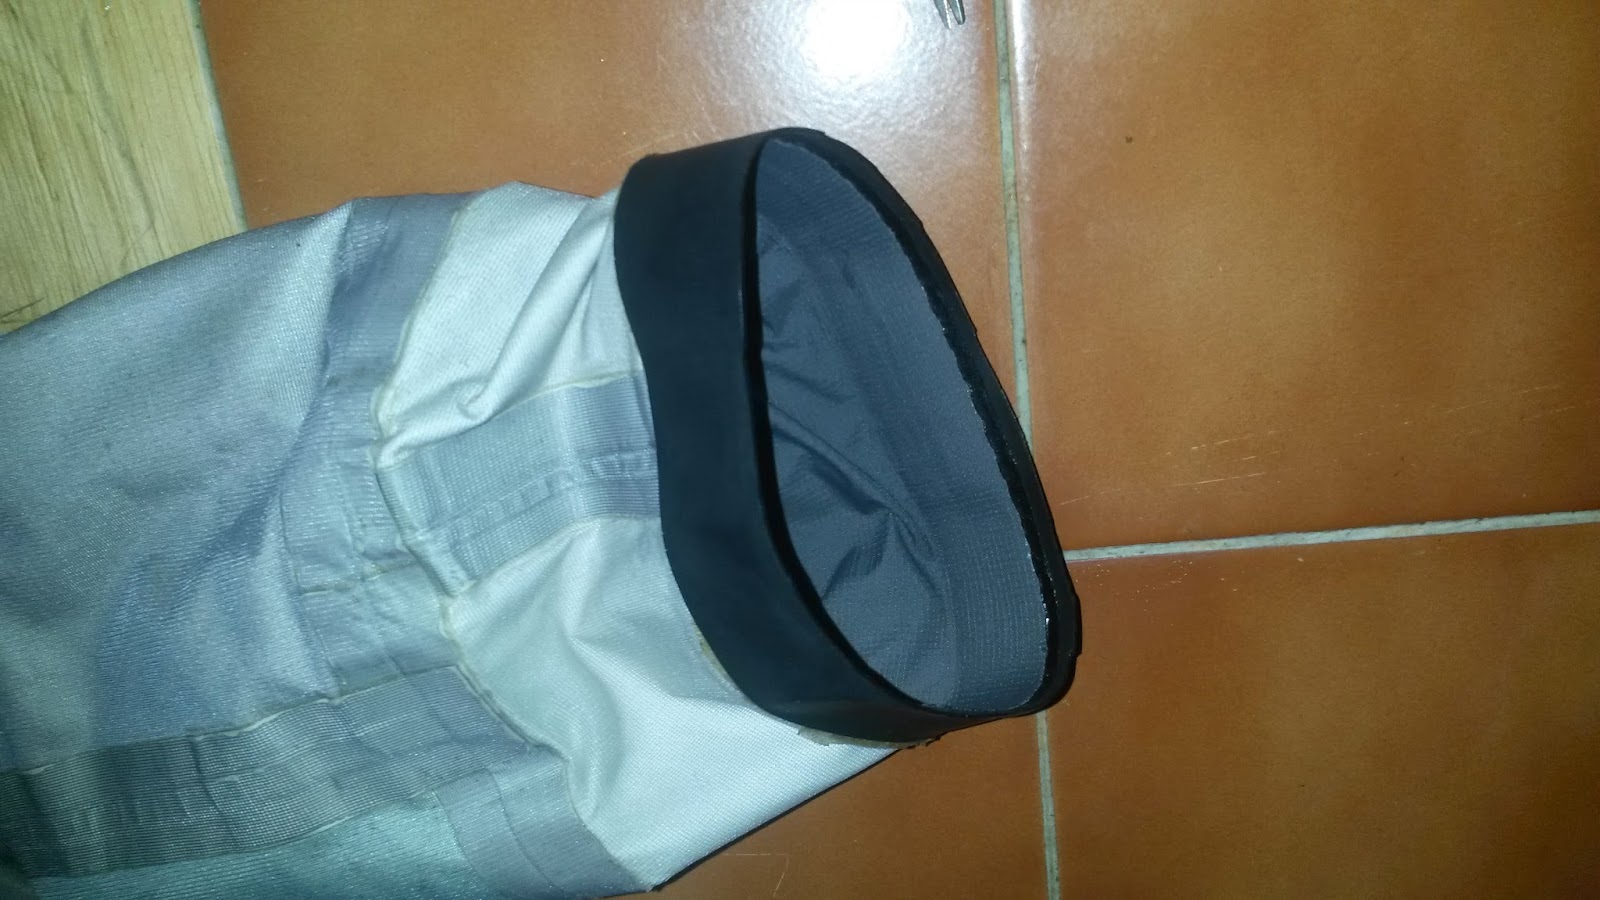
Start by cutting the old seal off the cag. I cut the rubber a few millimeters away from the end of the cag material itself using a sissors.

Sand the surface of the remaining rubber until the shiny surface of the material has been taken off, and then repeat for the areas on the seals which are going to be glued. I find it easiest to do the whole job with the cag turned inside out.


Squeeze glue onto the surfaces to be glued, and then spread it out with your finger. If you're doing this regularly and don't want to get cancer you should probably wear a glove or use a scraper, but there's something really satisfying about peeling impact glue off your fingers afterwards! Leave the glue to sit until it's dry to the touch, making sure that the cag and seal don't fold up and make contact with themselves. If two glued surfaces even touch each other it's a bit of a nightmare, the stuff isn't called contact adhesive for no reason!

Now for the trickiest bit. Stick the seal inside the sleeve of the cag, without touching either itself or the inside of the cag, line them up and stick them together. I find that by holding the seal as shown it's pretty easy, you can touch the two parts together in one place and work your way around the joint, making sure that there are no wrinkles in either of the bits as you go. Do a couple of dry-runs before you add the glue if you're not sure how it'll work. Give the seal and the cag a good push together all the way around the joint and that's it, you're done! If you have any wrinkles just force the two sides of the joint together, hold them flat for a second and the glue and the elasticity of the rubber should look after the rest.

Ta-Daa... Time to go kayaking! Total time taken; about 30 minutes. A neck seal takes a little bit longer but the process is the same. The seals will probably need to be trimmed afterwards to fit your wrists. Use a sharp sissors or stanley blade, and try not to leave any little nicks which will create a weak point in the seal. Cut off a little at a time until you're happy with the fit, and remember that the rubber will stretch a little after you take it on the water a few times. Happy paddling!
No comments:
Post a Comment